Step 1: Access the Store
To deploy a new Cloud Compute server:
-
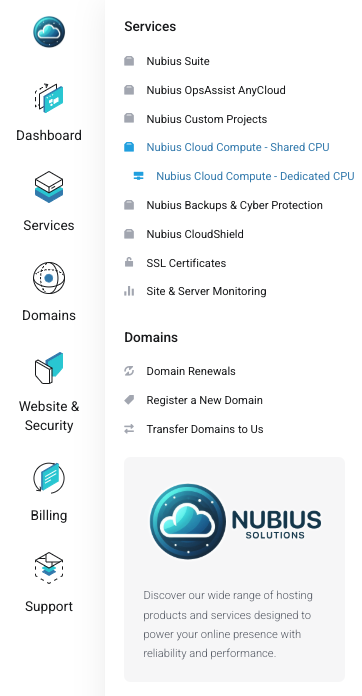
Go to the Nubius Store
-
Navigate to Cloud Compute Shared CPU or Dedicated CPU:
-
Shared CPU (High Frequency, Cloud Compute, High Performance)
-
Dedicated CPU (General Purpose, CPU Optimized, Memory Optimized, Storage Optimized)
-
Step 2: Selecting Server Location
We offer the following locations:
-
Atlanta
-
New York
-
Silicon Valley
-
Los Angeles
-
Mexico
-
Toronto
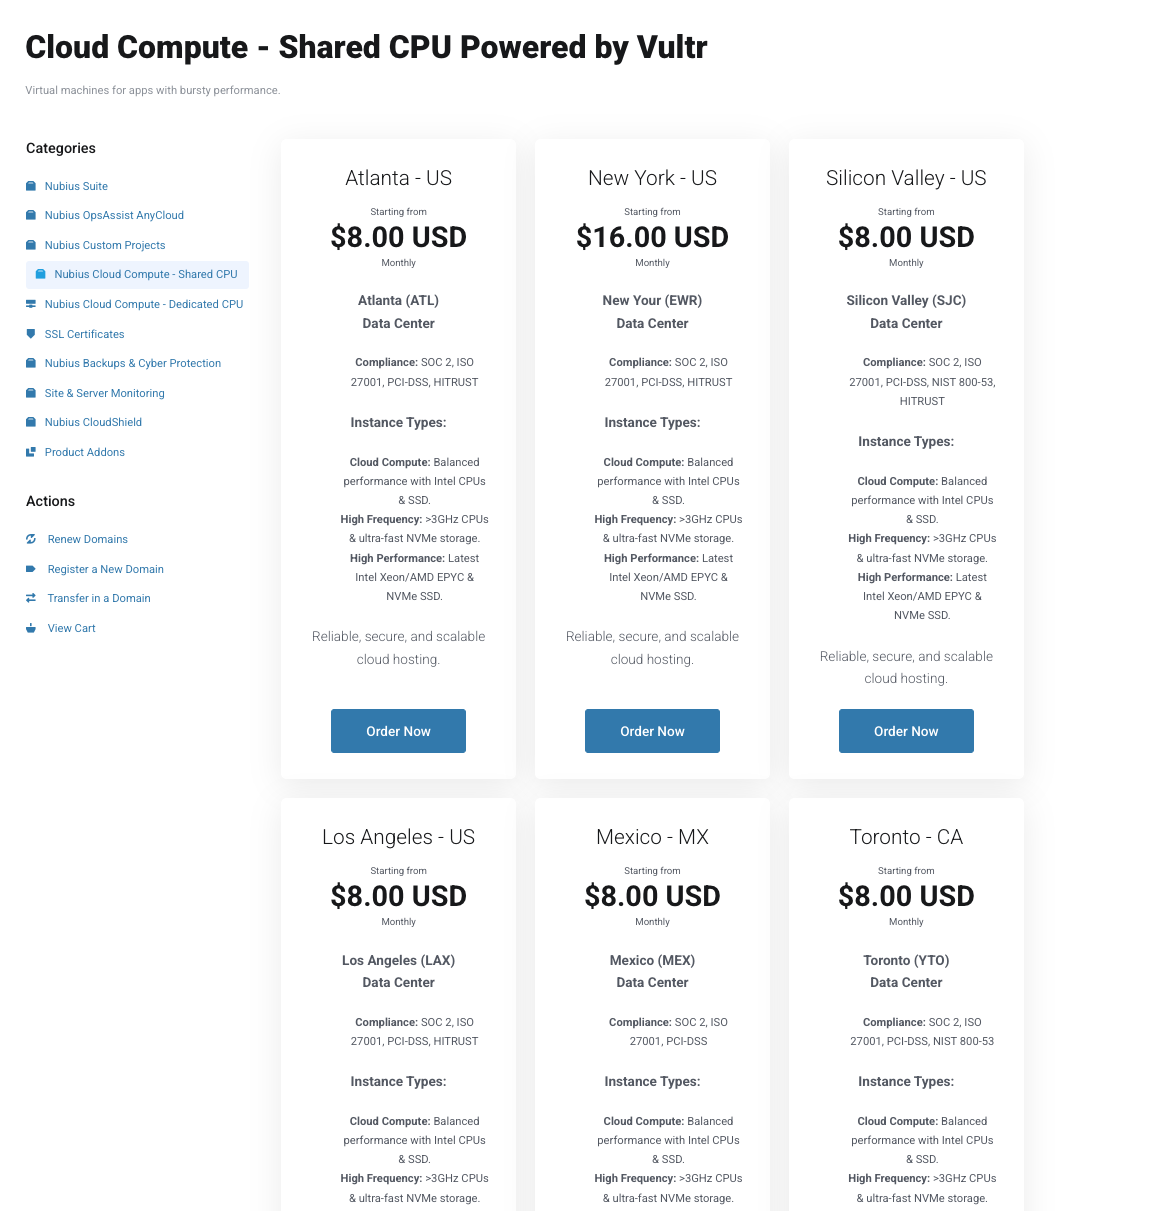
Each location displays available compliance options—review them before proceeding.
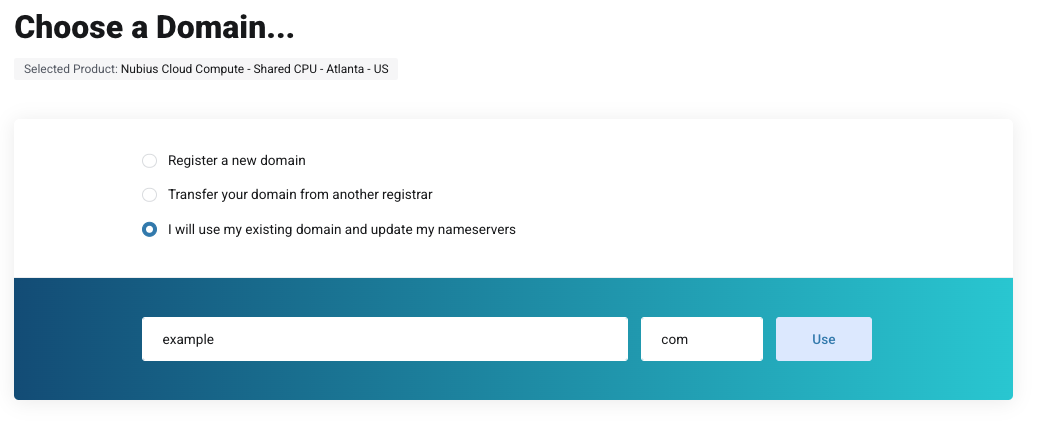
Step 3: Choosing a Domain
After selecting your server type and location, you will be prompted to choose a domain:
-
Register a new domain: If you need a new domain, select this option.
-
Transfer a domain from another registrar: You have a domain and you would like to transfer it to us.
-
Use an existing domain:
-
If you already own a domain but do not want to transfer it, select: “I will use my existing domain and update my name servers”.
-
This domain will be used for the server name.
-
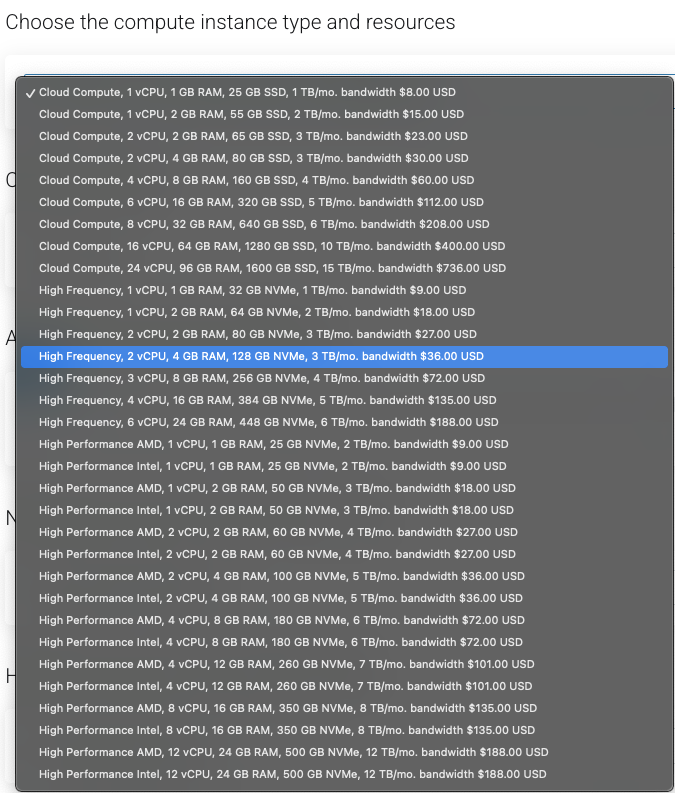
Step 4: Configuring Your Server
Once you’ve selected a domain, configure your server by choosing:
-
Instance Type (Learn more about the different instance types here).
-
Operating System: Select an option from the dropdown list.
-
Additional Reserved IPv4 Addresses (if needed): If you need more IPs than the one that comes with the server, you can increase the slider here. We limit the number of IPs for security reasons.
-
Storage Options: Select extra storage for the server, this is in addition to the storage the instance already brings. This storage will be attached to the server.
-
Hostname: subdomain of your selected domain.This will be used for the hostname of the server
-
Optional Add-ons:
-
SSL Certificates.
-
360 Monitoring.
-
Step 5: Completing the Order
-
Click Continue after finalizing the server configuration.
-
Proceed to the Checkout, if you already have an account, log in to it. If you do not have an account, you will be asked to create one and provide more information.
-
Once the invoice is paid, the system will provision your new server.
Note: Provisioning a new server can take up to 20 minutes. Please allow some time before accessing your server.
For further assistance, contact Support through the portal or email support@support.nubius.io.
